Monday, April 20, 2015

Outdoor Pallet Couch

Spring is here and summer, hopefully, will bring cookouts, lounging, and time with family and friends in our backyard. Last year, we only had a few cookouts, but folks had a hard time finding comfortable seating. Judy and I took a look at couches at Ikea and quickly were dissuaded by the prices. Since we are still riding this DIY kick, we took our search to the internet and quickly found a pallet couch. We estimated that we could build the couch for less than $300 (pallets, fabric, pillows, and cushions came out to $275) The original directions are a bit vague and confusing, so we decided to write out or procedure in hopes of helping folks out.

Materials/Tools
1. Circular Saw
2. Sander
3. Nine (9) 40x48" pallets
4. Five (5) 2x4x8s (optional)
5. Tape measure
6. Hammer
7. Crib Mattresses
8. Outdoor Fabric
9. Pillows

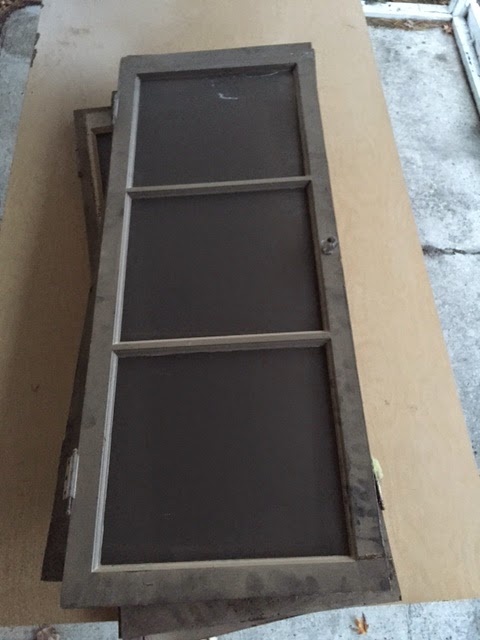
Measuring to cut the pallet
Step 1 - Size Two Sections
Judy and I looked for outdoor cushions, but we were not thrilled about $35 cushions from Ikea or $100 cushions from Home Depot. So, we opted for crib mattresses as suggested on the original blog. We hit craigslist and our friends and scrounged up three crib mattresses (under $40 for all three) and plan on making a cover for them using outdoor fabric. After that decision, we needed to size the pallets to fit the mattresses. A standard crib mattress measures 27.5" wide and the pallets that we used are 40x48". Use a circular saw to cut off 7.5" off the pallet's 40" side. We left 5" on the pallet to provide us with enough room for a back rest.
After cutting off the excess, we pried the remaining slats off of the excess piece and removed the nails from the thicker board. Then we placed the thicker piece of wood into the sized pallet to replace the part we removed.

Pallet Sized to 32.5"
Side shot of mattress and place holder
for backrest

Example of backing and mattress

Step 2 - Sizing the Chaise
The chaise is needed to be sized a little differently than the other pallets. We cut the final pallet into an L shape. The measurements are a bit tricky, but I've labeled an example below. Also, the mattress will hang about 5 inches over the pallet. But we remedied this with the next step.

Step 3 - Adding on to Chaise
Since there is about a 4 inch overhang, we needed to build a box of sorts to compensate for the 48" pallet. There are few options here: 1. build out a box using plywood, 2. use the leftover half pallet from the backrest to build out the chaise. We did the latter.
Diagram for sections 1 and 2


Diagram for L (section 3)


Diagrams of Pallet Couch Sections (Note: diagrams are not to scale)


Section 1, 2, and 3 attached
(note: overhanging mattress is not addressed in diagram)
Step 4 - Backrest
We left all the parts separate for easier storage. In other words, the pallets are not attached and back rest is simply resting on 2x4s. To make the backrests, we cut two pallets in half and attached 2x4s to the backside. We measured out 2x4s and used deck screws to attach the 2x4s to the shorter end of the pallets. Since the couch will be up against the garage, we decided simply push the base against the 2x4s to keep the backrests in place.

Guide Line for Saw

Cutting Pallet in Half for Backrest


Backrest
Step 5 - Sanding down the backrest
The pallets were quite dirty, so we decide to sand and poly them to cut down on the amount of dirt and splinters for our guests.

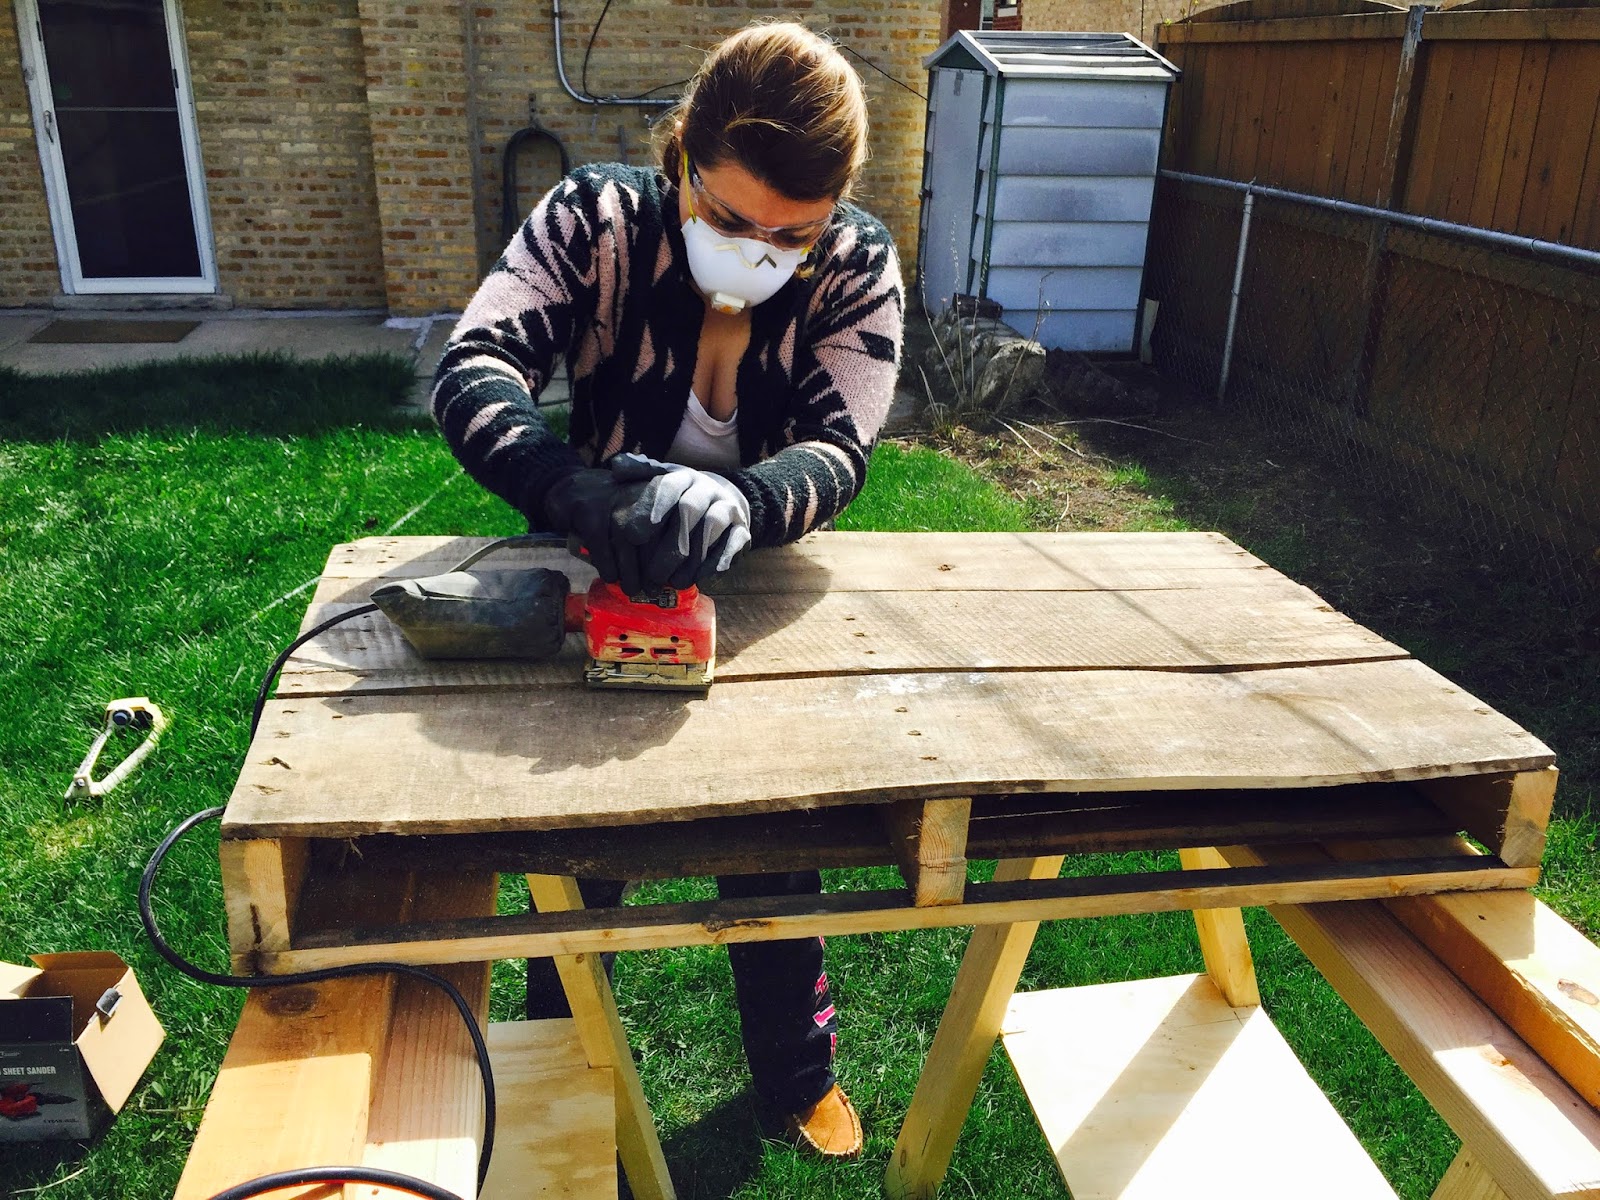
Judy working the sander on the backrest


Close up


Step 6 - Cushions and Pillows
What really makes this piece stand out are the cushions and pillows. Judy and I picked out some outdoor fabric from Joann's. The fabric for the cushions is outdoor fabric, but the pillows are made of canvas. We asked my mom to sew the pillow cases and cushions, so a huge thank you to her! There are tons of options for a backrest and the cushions (we kicked around the idea of using a bolster, but went with the pillows instead). We opted for the crib mattresses because they are significantly cheaper than buying $75/yard foam. We bought/found the three of our cushions for $38 on craigslist. The pillows are from Joanns too.


My buddy and I breaking in the couch


We really enjoyed this project and can't wait to share this couch with out family and friends. We'll send updates if we make anything else or notice any issues. Thanks for reading and please subscribe/share! 

If we were building this pallet couch again...

  • Save some time by using 2x4s to fill in for the pallet end. We did our best and were able to salvage most of the pallet, but the time we spend on removing nails would have been better spent doing other things. So, if we ever do this again, we would definitely use 2x4s to replace those ends (the one marked with a red arrow). See picture for more details. 


Wednesday, April 1, 2015

Repurposed Windows to Picture Frames


Repurposing materials is all the rage right now. I particularly enjoy repurposing because its good for the environment, extremely cost efficient, and, usually, the end product is superior in quality than a new affordable product.


In search of unique ways to frame photos, Judy stumbled upon a repurposed window used as a picture frame. Immediately, we wanted to take on the project. We kept an eye out for windows, but didn’t come across any until a few months later, I pulled out of my garage on my way to work when I noticed some windows my next door neighbor tossed in the alley. Put the car in reverse, hopped out, and picked up four windows.


The following weekend, we made these wonderful pictures frames for a total of about $20:


Materials
Used window
Pictures
Fabric (measured to fit)


Tools/Supplies
Staple Gun
Staples
Drill
French Cleat or Frame hanging kit
Tape or safety pins
Pictures


Step 1: Prep Work
Dirty Windows 
The windows I found were dirty beyond belief. I did my best to scrape and scrub the frame and glass before using a solution of vinegar and hot water to further clean the frame and glass. Once satisfied, I gave the glass a once over with some Windex.

I also made an attempt at stripping the paint, but ultimately decided to keep the original for more of a rustic look.
Stripped Paint


Pinned Picture
(My Father Building an Entertainment Center circa '83)

Taped Picture
Step 2: Place Photographs
Originally, our idea was to safety pin the photographs on to the fabric. This truly tested our patience. For the second frame we opted for the more practical, but less attractive, option of using tape. This worked fine, but I’d really prefer something else. I have a suggestion of what you can do below in the “If I were going to make this again” section.


Back of Frame
Step 3: Attach Fabric with Staple Gun
At JoAnn Fabrics, my wife and I looked through various materials to use as a backing. A burlap material with a chevron print stood out to us. Another option is wall paper samples behind the photographs. Most wall paper companies will mail out free samples on their website.


Cut the fabric so it clears about an inch outside of the glass. This can be cut down later if it protrudes. Start at the corner and staple down the fabric. Continue this process until one side is stapled. Next, do the same on the opposite side, but be sure to keep the fabric taut.


Step 4: French Cleat Attachment
Cleat on Wall
One of the last steps is to attached the french cleat. Decide where to hang the piece and, if possible, hold the frame against the wall and use a pencil to outline where the top corners will be. Then measure the window to find center and note the measurement. Using that measurement and the outline on the wall, mark the center point of where the cleat should go. Put the cleat on the wall and mark where the holes will go. Be sure the cleat is level. 


Cleat on Back of Frame
Using a drill, drill suggested guide holes from the directions on the back of the product into your wall. I enjoy using OOK’s French Cleat. It is available at most big box stores and Michaels and runs about $7. Repeat this process on the window frame.


Step 5: Hang
Finally, hang the piece and enjoy!


If I were going to make this frame again...
  • Recently, we took a trip to Habitat for Humanity’s ReStore. It’s a great place to search for odds and ends. I noticed they had a few old windows and doors that could be repurposed. Check it out if you’re in need of used windows.


  • We tried to pin our pictures to the first window and taped the pictures to the glass on the second frame. This works well, but a complete pain to remove or rearrange the photos (especially since we stapled the fabric to the window).

  • I recommend finding an alternate method of attaching the fabric to the windows. Once the fabric is stapled to the back of the window, it will be difficult to change out the photos in the future. An idea I had, but did not execute, is to upholster a thin piece of wood sized to fit the window. Then attach the photographs to the upholstered piece of wood and clip the wood behind the window with a few finishing nails hammered in at an angle. This will make it much easier to swap out photos.


    Once again, thanks for reading and following. Please share and stay tuned for our next project.


Sunday, March 29, 2015

Hansgrohe Cento Kitchen Faucet Installation


A kitchen faucet isn't exactly number one on my priority list for things to do. I don't spend a lot of time thinking about it unless it attempts to flood my kitchen; however, Judy wanted to change that sucker since day one. She fell in love with a Hansgrohe faucet from Costco. With a $259 price tag, we knew the faucet wouldn't be a reality for some time. But, just a few weeks ago, I received a Costco circular via email and saw that it was on sale for $179. I secretly snagged one and surprised Judy with it.

I figured that some folks might have hesitation about installing a faucet and I decided to write about the process to help shed some light.


Original Faucet
Hansgrohe Cento
Supplies
Faucet
Plumber's Tape
Towel/Rags

Tools
Basin Wrench
Screw Driver
Adjustable Wrench
Flashlight


Step 1: Prep the Work Area
Take all the cleaning supplies and whatnot from under the sink out. Lay down a towel to catch any water that might drip out of the pipes. Turn the hot and cold water supply off. Next, turn on the faucet to release any water that might remain. If a sprayer is present, turn that off as well.

Step 2Remove Existing Faucet
This step will vary depending on the style of faucet.
Cold Supply
Hot Supply
Disconnect the faucet's waterlines using two adjustable wrenches. Hold the water line in place and turn the supply line nut to remove. Remnants of water will leak from the lines, so have a towel or bucket handy. Ensure that the lines for hot, cold, and any attachments (like a sprayer) are removed. In the hot supply image, there are two valves because of the dishwasher.

Depending on the faucet that will be removed, there will be various mounting systems. Some require a phillips head screw driver, some a basin wrench, and others an adjustable wrench. When I removed mine, I thought I needed to use a socket wrench (don't ask). In the picture, I pointed out with a blue arrow what I thought needed to be unscrewed with a socket wrench. I eventually found out that the piece I point to with a red arrow needs to be removed (duh!).

I also made the mistake of removing the handle first. I unscrewed the top of the faucet using a phillips head screw driver. That turned out to be unnecessary because once I removed the mount, the entire thing was easy to pull out. I just needed to bend the copper pipes to get them out of the narrow countertop hole.

Step 3: Faucet Placement
If the previous faucet had separate knobs for hot and cold water, there should be three holes in the countertop. If this is the case, use the provided insert. If not, simply install without the insert. 

Mount, washer, and seal
Threading on faucet
Unscrew the washers and seals as directed in the directions. Drop down the supply line through the hole and place the thread part of the faucet in the hole. Next, under the sink, attach the washer, seals, and mount. A phillips screw driver is needed. 


Mount Attachment
Mount (make sure gray part is
parallel with sink)


Step 3Attach Supply lines
1/2" to 1/4" reducer
Use adjustable wrenches to attach the hot and cold supply lines. The sprayer can be attached to the water line with the provided hose. Simply snap the pieces together. Also, place the counter weight on the sprayer line. A problem I ran into is that the previous owner, for some reason, decided to attach a 1/2" valve to his cold line and 1/4" valve to his hot line. I had to run to the store to buy a reducer in order to finish attaching the lines. Attach the sprayer to the faucet. 

Step 4: Finish 
Turn the supply lines on slowly and check for leaks. I had a leak from the cold line. I must have accidentally loosened the valve when I attached the reducer. Look very closely and carefully to ensure that there are no leaks present. If there are, turn off the leaking supply and tighten everything. Here's the finished product.


Also, here's a video of Judy's reaction...

If I were going to make this bench again...
  • Use a piece of plywood or a wood board to lay on while under the sink. I did not do this an had the bottom part of the cabinet digging into my back the whole time. I used a towel eventually, but I think a piece of plywood would be better suited for this.
  • Check the size of the valves before assembling. I didn't do this and had to run to the store to pick up that reducer. 
Thanks again for reading. I hope some folks find this helpful. Also, please subscribe and share. Here's a sneak peek at next week's post...


Black Pipe and Lumber Bench


To match our beautiful new dining room table, my wife and I made a matching bench. In total this project should run just under $75 (included into the cost of the table from last week's post). Folks love our bench and I considered making one for outside using cedar or AC2 treated lumber.

Finished Product

Materials (bench only):
3 - 3" nipples
6 - 4" nipples
6 - 6" nipples
6 - Ts
12 - Flanges
1 - 2x12x6  (Use the extra piece of lumber from the table project)
All pipes should be in 3/4" size

A few notes about materials: we used black pipe for our table, but you could get away with using galvanized pipe. Galvanized pipes are cheaper and this is particularly useful if you are going to paint the pipes. Example: Flanges are the biggest cost here. Menards has the best price for flanges of the big box stores. A black pipe flange costs about $5 but a galvanized flange is about $4 at Menards. On flanges alone you can save over $12 by using galvanized. The other fittings will be about 20% cheaper as well.

Supplies/Tools:
  1. Orbital Sander
  2. Utility Knife
  3. Circular Saw
  4. Tape Measure
  5. 1/2 pint of wood stain  (Carrington Color)
  6. Epoxy Resin (Last four items are optional for glazing the bench)
  7. 4 - 6 Disposable Quart tubs 
  8. Disposable Putty Knife 
  9. Plastic sheeting/Tarp
Step 1 - Prep Work:
Sanded Lumber
Lumber - Using your orbital sander, sand down the lumber. Be sure to sand down the short edges (I did not do a good job of this and its snags our clothes on occasion). You can also use a utility knife to dull the short edges, giving your table more of a weathered look. Sand down any item numbers that maybe stamped on the wood. I also recommend that the lumber be cut down to five and half feet so it can be tucked under the table.
Pipes - Prepping the pipes can be a pain in the butt. Remove the labels from the pipes by soaking them in hot, soapy water. Following this process, removing the labels is some what easier than removing them with a utility knife alone. Dry the pipes with a towel.

Optional step: I spray painted the pipes a bronze color. I primed them first and then sprayed them. Although I did a test run without primer and liked the look, I ultimately opted for both coats for a smoother finish.

Short Edge (only two legs in this image)


Painted Pipes


Stained Lumber - note short edge dulled with utility knife
Step 2 - Staining:
After sanding the lumber, wipe down the lumber in preparation for staining. We played with a couple of stains before deciding on carrington, one of our favorite stains. Make sure the work area is free from anything that can be damaged by the stain. Trust me, stain will get everywhere. Using a brush, apply the stain and wipe off immediately with a clean rag. The longer stain sits on the wood, the darker the wood will get, but the less the grain will show. It is really a matter of preference, but I prefer a lighter tone on the wood. The stain should be allowed to dry for at least 24 hours before moving to the next step.


Glazed Plank
Step 3 - Glazing (optional, but recommended):
A friend of ours recommended that we use a bar top glaze to protect the wood. He said that our table would be protected from dings and it would be much easier to clean. The glaze can be expensive (we bought a gallon for $64 at Menards, but a $22 quart should suffice for the table and bench). Prep the area properly by covering the floor with plastic sheeting, making sure the planks are separated, off the floor, and leveled. I used my iPhone's level app to make sure the planks were level.


We used some buckets and scaffold steps to keep our planks off the floor. To level them, we used wooden shims. Since the glaze is self leveling, the excess will run off the sides. If the planks are not off the floor, they will be permanently "glued" to the ground.

Follow the prep directions on the back of the glaze. Pour the prepared glaze on to the wood. It takes about 10 minutes before the glaze starts to cure. I poured it on in an S pattern and my wife evened out the glaze while I poured. Additionally, we used a heat gun to remove any air bubbles. We glazed the bench after glazing the table and the finished result came out blotchy as the glaze started to cure by the time we got to the bench.

After the glaze has been applied, wait 72 hours for the glaze to properly cure. In the mean time, paint the fittings.

"H" Legs
Step 4 - Pipe Assembly 
Take the painted pipes and assemble three legs. I used three legs to help balance out the weight of individuals. I felt like two legs would not support and eventually break if too much weight was added. Each leg will need four flanges, two Ts, two 4" nipples, two 6" nipples, and one 3" nipple. Assemble as shown.

Step 5 - Bench Assembly 
Flip the lumber glazed side down. I found the center of the bench and marked it with a pencil. Next I measured the half way point between the center and each edge. I marked those spots and decided were to place my legs based on aesthetics.  Drill guide holes into the flanges before drilling in the screws. Eight screws per leg will suffice. Flip it over and take a load off.

I hope this helps and please share and subscribe!


If I were going to make this bench again...

  • Spend extra time sanding down the short edges. Our clothes keep snagging on the short edges because it is not sanded down all the way and the glaze did not cover the short edges completely completely. 
  • If painting the pipes, buy galvanized pipe to save about 15%
  • Cut the lumber shorter than the table. One of my regrets with this projects is that I did not cut the lumber shorter than the table. We can not tuck the bench under the table to give us more room when it is not in use.

Sunday, March 22, 2015

Breaking DIY's First Giveaway Winner!


I'm pleased to announce the winner of Breaking DIY's first giveaway. An enormous thanks for all the folks who entered, shared, and supported on social media. We're off to a great start and look forward to continued post.

Drum roll please!

The winner of our first giveaway is Christina P!
I hope you enjoy the coffee table!
Contest Drawing and Timestamp
Crate Coffee Table


Thank you so much for all the love and support. Please subscribe, share, comment, and stay tuned for other projects and giveaways. I plan on keeping this blog going for at least three months. Please feel free to suggest project. Think about projects that you'd like see, but don't have the time, energy, or tools to do. I'll give them my best shot and write about them here. Check out this week's post here. Thanks again for all the love!