Sunday, March 29, 2015

Hansgrohe Cento Kitchen Faucet Installation


A kitchen faucet isn't exactly number one on my priority list for things to do. I don't spend a lot of time thinking about it unless it attempts to flood my kitchen; however, Judy wanted to change that sucker since day one. She fell in love with a Hansgrohe faucet from Costco. With a $259 price tag, we knew the faucet wouldn't be a reality for some time. But, just a few weeks ago, I received a Costco circular via email and saw that it was on sale for $179. I secretly snagged one and surprised Judy with it.

I figured that some folks might have hesitation about installing a faucet and I decided to write about the process to help shed some light.


Original Faucet
Hansgrohe Cento
Supplies
Faucet
Plumber's Tape
Towel/Rags

Tools
Basin Wrench
Screw Driver
Adjustable Wrench
Flashlight


Step 1: Prep the Work Area
Take all the cleaning supplies and whatnot from under the sink out. Lay down a towel to catch any water that might drip out of the pipes. Turn the hot and cold water supply off. Next, turn on the faucet to release any water that might remain. If a sprayer is present, turn that off as well.

Step 2Remove Existing Faucet
This step will vary depending on the style of faucet.
Cold Supply
Hot Supply
Disconnect the faucet's waterlines using two adjustable wrenches. Hold the water line in place and turn the supply line nut to remove. Remnants of water will leak from the lines, so have a towel or bucket handy. Ensure that the lines for hot, cold, and any attachments (like a sprayer) are removed. In the hot supply image, there are two valves because of the dishwasher.

Depending on the faucet that will be removed, there will be various mounting systems. Some require a phillips head screw driver, some a basin wrench, and others an adjustable wrench. When I removed mine, I thought I needed to use a socket wrench (don't ask). In the picture, I pointed out with a blue arrow what I thought needed to be unscrewed with a socket wrench. I eventually found out that the piece I point to with a red arrow needs to be removed (duh!).

I also made the mistake of removing the handle first. I unscrewed the top of the faucet using a phillips head screw driver. That turned out to be unnecessary because once I removed the mount, the entire thing was easy to pull out. I just needed to bend the copper pipes to get them out of the narrow countertop hole.

Step 3: Faucet Placement
If the previous faucet had separate knobs for hot and cold water, there should be three holes in the countertop. If this is the case, use the provided insert. If not, simply install without the insert. 

Mount, washer, and seal
Threading on faucet
Unscrew the washers and seals as directed in the directions. Drop down the supply line through the hole and place the thread part of the faucet in the hole. Next, under the sink, attach the washer, seals, and mount. A phillips screw driver is needed. 


Mount Attachment
Mount (make sure gray part is
parallel with sink)


Step 3Attach Supply lines
1/2" to 1/4" reducer
Use adjustable wrenches to attach the hot and cold supply lines. The sprayer can be attached to the water line with the provided hose. Simply snap the pieces together. Also, place the counter weight on the sprayer line. A problem I ran into is that the previous owner, for some reason, decided to attach a 1/2" valve to his cold line and 1/4" valve to his hot line. I had to run to the store to buy a reducer in order to finish attaching the lines. Attach the sprayer to the faucet. 

Step 4: Finish 
Turn the supply lines on slowly and check for leaks. I had a leak from the cold line. I must have accidentally loosened the valve when I attached the reducer. Look very closely and carefully to ensure that there are no leaks present. If there are, turn off the leaking supply and tighten everything. Here's the finished product.


Also, here's a video of Judy's reaction...

If I were going to make this bench again...
  • Use a piece of plywood or a wood board to lay on while under the sink. I did not do this an had the bottom part of the cabinet digging into my back the whole time. I used a towel eventually, but I think a piece of plywood would be better suited for this.
  • Check the size of the valves before assembling. I didn't do this and had to run to the store to pick up that reducer. 
Thanks again for reading. I hope some folks find this helpful. Also, please subscribe and share. Here's a sneak peek at next week's post...


Black Pipe and Lumber Bench


To match our beautiful new dining room table, my wife and I made a matching bench. In total this project should run just under $75 (included into the cost of the table from last week's post). Folks love our bench and I considered making one for outside using cedar or AC2 treated lumber.

Finished Product

Materials (bench only):
3 - 3" nipples
6 - 4" nipples
6 - 6" nipples
6 - Ts
12 - Flanges
1 - 2x12x6  (Use the extra piece of lumber from the table project)
All pipes should be in 3/4" size

A few notes about materials: we used black pipe for our table, but you could get away with using galvanized pipe. Galvanized pipes are cheaper and this is particularly useful if you are going to paint the pipes. Example: Flanges are the biggest cost here. Menards has the best price for flanges of the big box stores. A black pipe flange costs about $5 but a galvanized flange is about $4 at Menards. On flanges alone you can save over $12 by using galvanized. The other fittings will be about 20% cheaper as well.

Supplies/Tools:
  1. Orbital Sander
  2. Utility Knife
  3. Circular Saw
  4. Tape Measure
  5. 1/2 pint of wood stain  (Carrington Color)
  6. Epoxy Resin (Last four items are optional for glazing the bench)
  7. 4 - 6 Disposable Quart tubs 
  8. Disposable Putty Knife 
  9. Plastic sheeting/Tarp
Step 1 - Prep Work:
Sanded Lumber
Lumber - Using your orbital sander, sand down the lumber. Be sure to sand down the short edges (I did not do a good job of this and its snags our clothes on occasion). You can also use a utility knife to dull the short edges, giving your table more of a weathered look. Sand down any item numbers that maybe stamped on the wood. I also recommend that the lumber be cut down to five and half feet so it can be tucked under the table.
Pipes - Prepping the pipes can be a pain in the butt. Remove the labels from the pipes by soaking them in hot, soapy water. Following this process, removing the labels is some what easier than removing them with a utility knife alone. Dry the pipes with a towel.

Optional step: I spray painted the pipes a bronze color. I primed them first and then sprayed them. Although I did a test run without primer and liked the look, I ultimately opted for both coats for a smoother finish.

Short Edge (only two legs in this image)


Painted Pipes


Stained Lumber - note short edge dulled with utility knife
Step 2 - Staining:
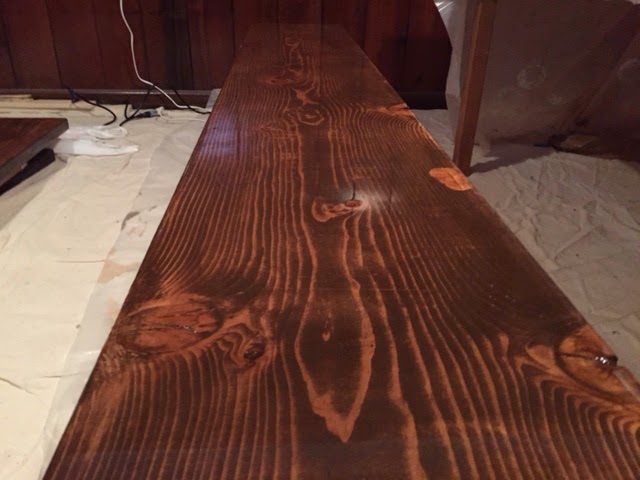
After sanding the lumber, wipe down the lumber in preparation for staining. We played with a couple of stains before deciding on carrington, one of our favorite stains. Make sure the work area is free from anything that can be damaged by the stain. Trust me, stain will get everywhere. Using a brush, apply the stain and wipe off immediately with a clean rag. The longer stain sits on the wood, the darker the wood will get, but the less the grain will show. It is really a matter of preference, but I prefer a lighter tone on the wood. The stain should be allowed to dry for at least 24 hours before moving to the next step.


Glazed Plank
Step 3 - Glazing (optional, but recommended):
A friend of ours recommended that we use a bar top glaze to protect the wood. He said that our table would be protected from dings and it would be much easier to clean. The glaze can be expensive (we bought a gallon for $64 at Menards, but a $22 quart should suffice for the table and bench). Prep the area properly by covering the floor with plastic sheeting, making sure the planks are separated, off the floor, and leveled. I used my iPhone's level app to make sure the planks were level.


We used some buckets and scaffold steps to keep our planks off the floor. To level them, we used wooden shims. Since the glaze is self leveling, the excess will run off the sides. If the planks are not off the floor, they will be permanently "glued" to the ground.

Follow the prep directions on the back of the glaze. Pour the prepared glaze on to the wood. It takes about 10 minutes before the glaze starts to cure. I poured it on in an S pattern and my wife evened out the glaze while I poured. Additionally, we used a heat gun to remove any air bubbles. We glazed the bench after glazing the table and the finished result came out blotchy as the glaze started to cure by the time we got to the bench.

After the glaze has been applied, wait 72 hours for the glaze to properly cure. In the mean time, paint the fittings.

"H" Legs
Step 4 - Pipe Assembly 
Take the painted pipes and assemble three legs. I used three legs to help balance out the weight of individuals. I felt like two legs would not support and eventually break if too much weight was added. Each leg will need four flanges, two Ts, two 4" nipples, two 6" nipples, and one 3" nipple. Assemble as shown.

Step 5 - Bench Assembly 
Flip the lumber glazed side down. I found the center of the bench and marked it with a pencil. Next I measured the half way point between the center and each edge. I marked those spots and decided were to place my legs based on aesthetics.  Drill guide holes into the flanges before drilling in the screws. Eight screws per leg will suffice. Flip it over and take a load off.

I hope this helps and please share and subscribe!


If I were going to make this bench again...

  • Spend extra time sanding down the short edges. Our clothes keep snagging on the short edges because it is not sanded down all the way and the glaze did not cover the short edges completely completely. 
  • If painting the pipes, buy galvanized pipe to save about 15%
  • Cut the lumber shorter than the table. One of my regrets with this projects is that I did not cut the lumber shorter than the table. We can not tuck the bench under the table to give us more room when it is not in use.

Sunday, March 22, 2015

Breaking DIY's First Giveaway Winner!


I'm pleased to announce the winner of Breaking DIY's first giveaway. An enormous thanks for all the folks who entered, shared, and supported on social media. We're off to a great start and look forward to continued post.

Drum roll please!

The winner of our first giveaway is Christina P!
I hope you enjoy the coffee table!
Contest Drawing and Timestamp
Crate Coffee Table


Thank you so much for all the love and support. Please subscribe, share, comment, and stay tuned for other projects and giveaways. I plan on keeping this blog going for at least three months. Please feel free to suggest project. Think about projects that you'd like see, but don't have the time, energy, or tools to do. I'll give them my best shot and write about them here. Check out this week's post here. Thanks again for all the love!


Saturday, March 21, 2015

Pipes and Wood: Dining Room Table


After building the crate coffee table, I felt the need to build something else. My wife suggested we get a new dining room table and she was hoping to get something like this. Since we just purchased our home, my wife and I were in no position to shell out over a grand for a dining room table. I searched around the web and found directions for a relatively easy and affordable DIY table and bench. Much to my wife's surprise, I immediately went out to Menards and bought supplies.

The project can vary greatly in cost. I originally estimated $250-300 for the table and bench, but, in the end, the total cost came closer to $400 (mainly because we chose to glaze the table which tacked on a extra $60). By far the most expensive pieces of the project are the black iron pipe. I think I paid $250 for the pipe alone, but I did end up returning somethings as the directions from the original site were not crystal clear. In attempts to make the process easier for someone else, I've broken down the steps for the table below.

Finished Table with Bench
Please feel free to laugh at the astonishing amount of times I write nipples...

Materials (table only):
12 - 3" nipples
4 - 18" nipples
4 - 8" nipples
2 - 24" nipples
4 - 90° elbows
8 - Ts
12 - Flanges
2 - 2x12x12  (ask them to cut these in half at Menards or cut them yourself)
3 - 1 x 3 x 18 pieces of lumber
All pipes should be in 3/4" size

A few notes about materials: we used black pipe for our table, but you could get away with using galvanized pipes. Galvanized pipes are cheaper and this is particularly useful if you are going to paint the pipes. Example: Flanges are the biggest cost here. Menards has the best price for flanges of the big box stores. A black pipe flange costs about $5 but a galvanized flange is about $4. On flanges alone you can save over $12 by using galvanized. The other fittings will be cheaper as well.

Supplies/Tools:
  1. Orbital Sander
  2. Tape Measure
  3. Utility Knife
  4. Circular Saw
  5. 1/2 pint of wood stain  (Carrington Color)
  6. Spray paint (optional: Hammered Bronze)
  7. Rags
  8. Epoxy Resin (Optional)
  9. 4 - 6 Disposable Quart tubs (Optional for glaze)
  10. Disposable Putty Knife (Optional)
  11. Plastic sheeting (Optional)

Step 1 - Prep Work:
Sanding - Short Edges Visible Here
Lumber - Use the orbital sander to sand down the lumber. Be sure to sand down the short edges throughly (I did not do a good job of this and it snags our clothes on occasion). Next use a utility knife to wear down the short edges, this gives the table more of a weathered look. Sand down any item numbers that maybe stamped on the wood.


Fittings/Flanges/Ts
Pipes - Prepping the pipes can be a pain in the butt. Remove the labels from the pipes by soaking them in hot, soapy water. Following this process, removing the labels is some what easier than removing them with a utility knife alone. Dry the pipes with a towel.
Optional step: I spray painted the pipes a bronze color. I primed them first and then sprayed them. Although I did a test run without primer and liked the look, I ultimately opted for both coats for a smoother finish.

With Primer and Rec. Assemble 
Flange w/ no primer
Step 2 - Staining:
After sanding the lumber, wipe down the lumber in preparation for staining. Use compressed air to remove pesky saw dust. We played with a couple of stains before deciding on carrington, one of our favorite stains. Make sure the work area is free from anything that can be damaged by the stain. Trust me, stain will get everywhere. Using a brush, apply the stain and wipe off immediately with a clean rag. The longer stain sits on the wood, the darker the wood will get, but less grain will show. It is a matter of preference, but I prefer a lighter tone on the wood. The stain should be allowed to dry for at least 24 hours before moving to the next step.

Stain Options (R-L: Jacobean, Carrington, and Cherry)
Stained Wood


Optional Glaze Coating

Step 3 - Glazing (optional, but recommended):
A friend of ours recommended that we use a bar top glaze to protect the wood. He said that our table would be protected from dings and it would be much easier to clean. The glaze can be expensive (we bought a gallon for $60 at Menards, but a $22 quart should suffice). Prep the area properly by covering the floor with plastic sheeting, making sure the planks are separated, off the floor, and leveled. I used my iPhone's level app to make sure the planks were leveled.

Prep for Glaze


We used some buckets and scaffold steps to keep our planks off the floor. To level them, we used wooden shims. Since the glaze is self leveling, the excess will run off the sides. If the planks are not off the floor, they will be permanently "glued" to the ground.

Follow the prep directions on the back of the glaze. Pour the prepared glaze on the wood. It will only take about 10 minutes before the glaze starts to cure. I poured it on in an S pattern and my wife evened out the glaze while I poured. Additionally, we used a heat gun to remove any air bubbles. I suggest using one batch of glaze for the three table planks and a separate batch for the bench. We only used one batch for the table and the bench and by the time we got to the bench, the glaze had started to cure and made applying the glaze unnecessarily difficult.

After the glaze has been applied, wait 72 hours for the glaze to properly cure.

Step 4 - Painting and Assembling the Pipe (optional, but recommended):
Leg Assembly 
It can be difficult to hit all the sides of the fittings with spray paint, so I assembled a flange, nipple, and a fitting together (see picture in step 1). First I applied the primer and waited a few hours before applying the hammered bronze color. Personally, I liked the look of the black pipe, but my wife thought the bronze looked nicer. Ultimately, I was happy with the final product. Wait until the next day to assemble.

Leg Assembly: Using three flanges, 3 - 3" nipples, one 90° elbow, 2 Ts, an 18" pipe, and a 6" pipe. Assemble as shown in the photo.

The original directions ask that the legs be attached by the 24" nipple. By following this step, the table will be sturdy and won't wobble. What's the trade off? If planning on using seats at the head, guest won't be able to tuck their knees in all the way (see photo).


Note the brown chair barely clears the 24" pipe

Step 5 - Table Assembly 
Take the fully cured pieces of lumber to the table location. Decide on which pieces will go where. Flip the pieces glazed side down. Use one of the three pieces of spare wood and twelve 3/4" wood screws to secure the pieces of lumber together. I measured and predrilled the pieces of spare wood in order to make sure the screws would go in all the way. Once all three pieces of wood are attached to the lumber, the legs can be attached.

Make sure that each set of legs is equidistant from the edge of the table. I believe I measured 3 1/2" from the long and short side of the lumber. Drill guide holes into the flanges before drilling in the screws. Eight screws per leg will suffice. Below is a video of the assembly process. Flip the table over and adjust the fittings to make sure the table is level. 


Here are a few shots of the finished product.


Finished table with matching bench


To build the bench, follow the directions here


If I were going to make this table again...
  • Spend extra time sanding down the short edges. Our clothes keep snagging on the short edges (head of table) because it is not sanded down all the way and the glaze did not cover the edge completely there. 
  • If painting the pipes, buy galvanized pipe to save about 15%
  • Either make the table taller by using pipe that is longer than 18" for the legs OR simply do not attach the 24" pipe that joins each leg. I ended up taking mine out because our guests kept bumping their knees into the table. It's not as sturdy as it was before, but at least we can tuck the chairs in easily and people can sit comfortably. 
  • The glaze can be a pain and can get expensive, but I would recommend it. People have spilled all sorts of stuff on our table and we just wipe it clean off. Also, I would imagine that an unglazed table would eventually scratch deeper than the stain and show the pine color underneath. 

I really hope this helps anyone tackling this project. My wife and I really enjoyed the process of making the table and everyone looks at our table and says, "Wow, you guys built that?" Feel free to leave a comment with a question and I'll do my best to respond. Additionally, if you enjoy the post, please subscribe and share!


Sunday, March 15, 2015

DIY Crate Coffee Table


“Are you sure we can pull that off? It looks a little difficult and what if it’s the wrong size? Is it even durable?” I casted my doubts to my partner after she suggested we make a coffee table she came across on Pintrest. That conversation took place over a year ago and I had no idea that I’d be hooked. A DIY fiend, I have become.

In this post, I delineate the steps of creating your own crate coffee table along with some of the things I’ve learned through the process. Also, there is a video of assembly here.


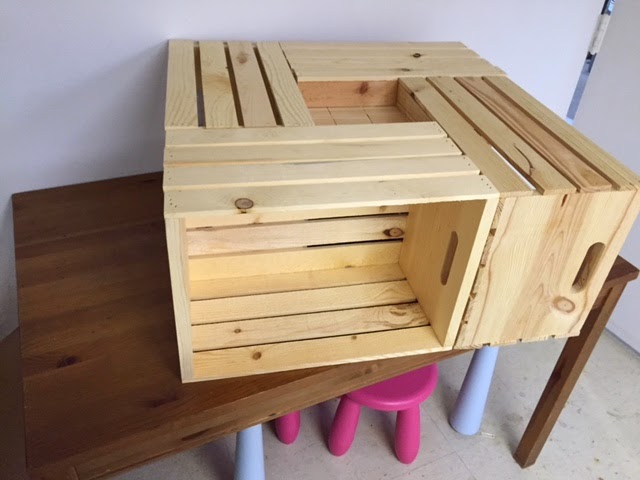
Optional Insert (unstained)
Supplies
  1. Four (4) crates* (available from Home Depot, Michaels, and other locations)
  2. Quarter of a ½” plywood sheet
  3. Four (4) 3” casters** (available from Ikea or HD)
  4. Stain
  5. Polyurethane (recommended)
  6. Spare wood
  7. Wood Glue
  8. Wood screws (30+)


*Michaels typically has the best price and often has coupons to reduce the price further.
**This is the most costly aspect of the project and optional if you don’t want the table to move

Tools
Unstained - Alternate View


  1. Orbital sander
  2. Circular Saw
  3. Drill
  4. Paint Brush 
  5. Foam Brush


Step 1: Prep/Sanding
Remove the affixed price tag from the crates. It doesn’t have to be immaculate, the sander will take care of anything not removed. I recommend sanding the inside thoroughly. The roughness of the wood on the inside makes it difficult to stain. Essentially it doesn't matter too much if the inside is not sanded down completely, but it does make staining a bit easier.

At this time, cut a 9"x9" square of wood. I used an old wine box cover from Binny's They sell them for $2. This step can be skipped. Cut the piece into three 3"x9" slats. These slats will serve as the center cubby.

Step 2: Staining
After sanding the lumber, wipe down the lumber in preparation for staining. Use compressed air to remove pesky saw dust. We played with a couple of stains before deciding on carrington, one of our favorite stains. Make sure the work area is free from anything that can be damaged by the stain. Trust me, stain will get everywhere. Using a brush, apply the stain and wipe off immediately with a clean rag. The longer stain sits on the wood, the darker the wood will get, but less grain will show. I work my way from inside the crate and wipe off any stain that makes its way to the outside of crate. 


Step 3: Polyurethane
I used polyurethane to make sure that cleaning the table would be a breeze and for durability. We've had our table for about a year and it is holding up nicely. Decide which side will act as the top of the coffee table. I try to pick the most aesthetically pleasing side and also make sure the inserts will fit. Sometimes the inserts will not fit because the boxes do not line up properly). Using a foam brush, apply the poly evenly. Try to catch any drips that fall inside with newspaper. Also, carefully apply poly to the knots in the wood. Poly tends to turn a blueish color when it dries and will settle inside the spaces if not remedied.

Use two screws to secure the boxes
Step 4: Assembly
Boxes - Using wood screws attach one box to the other as pictured. Continue until all four boxes are attached. I used two screws towards the top of the table. Drill guide holes and hold the boxes firmly together while drilling.

Base - Once the boxes are attached, flip the table and screw in the base. Be sure to pre-drill holes and drill into the thickest part of boxes (the short edges). I made a mistake and screwed through one of the thinner pieces of wood. It now protrudes and could be a hazard.

My attempt at gluing the slats (look at the very top)
Casters - Pre-drill holes for the casters. I like placing my casters about 1" away from each corner. 

Inserts/Cubby - Use wood glue to secure the insert to the box. It's not easy to do, and I'm sure there's a better way to do this. Once the slats were in place, I placed a drill inside the cubby to keep the slats pressed down while the glue dried. 

Once the glue is dry, the table is complete. Enjoy!

If you liked this project please subscribe and follow me. Also, this month to kick off my blog, I'm going to have a give-away. One lucky participant will have a chance to win this coffee table (A $200 value).  See details on my wife's youtube page

Giveaway Requirements:
1. Subscribe to my wife's youtube channel
2. Subscribe and comment to this blog post
3. Repost my blog on Facebook or instagram using the hashtag #BreakingDIYGiveaway

Rules:
Winner must live within 20 mile of our neighborhood for local delivery. If winner lives further than 20 miles, winner will have to arrange for pick up. Winner will be selected on March 22, 2015. Good luck!

Final Product


If I were going to make this table again...
Babies love this, but it's totally not baby safe. 
  • On our first try, we skipped the insert and the base. The table has held up for over a year and only needed some tightening. I would op for the base, but measure carefully!
  • We also opted for the KALLAX casters for further support. A problem we incurred is the screws penetrated the wood further than expected to secure the wheels. This is okay since we don't have kids and we typically load up decorations over the screws. With no plywood base, the table doubles as a baby walker. 


Stay tuned for my next project!
Black Pipe and Lumber Dining Table